Monday

Armature feet and hand builds


To make the feet I first drew a template of the size and shape I wanted on a piece of paper


I marked where the tie downs would be and also where the gap to allow the foot to bend would be also


I then traced this onto some steel plate. I done this so that I could use magnets as well as tie downs if needed for extra support


I drilled holes where the tie downs would be before cutting it to make it easier


I then roughly cut out the foot plates


I filed them to get the right shape


I cut them to allow bend in the foot for walking


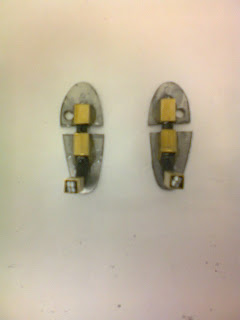
using two part epoxy resin I glued K&S tubing to the feet


I then added wire to the feet and more Tubing to attach them to my armature


Here are the final feet attached to armature. I added an m3 nut to the feet to allow them to be tied down to the set with some m3 threaded bar


I made the hands using milliput and twisted aluminum wire


milliput is a two part epoxy putty which you mix together in equal parts and can be sculpted but air drys solid


I twisted some wire  fingers and placed it into the milliput palm


I then added a twisted wire wrist


I allowed it to dry 


I then cut the fingers to size and added K&S to attach to armature


I added some milliput to my waist and chest sections also to add extra strenght


Here is my full complete armature.
The next stage will be to pad it out with foam which I will show later


Armature Build


So I  have finally got around to the building and making section of my film. To start off I decided I would make the armature for my main character Ted. He will be the only animatable stop motion puppet in the film and the rest will be 2D characters.

To start off I printed out the plans for my character to scale so as i could cut and measure the components needed to the right size.


The armature was made using K&S Brass tubing, Circular tubing and twisted aluminum wire


I began by measuring the the tubing against my model sheet plans. The tubing is used to help create joints over the twisted wire by stopping legs and arms and chest bending where they wouldn't on a real person allowing room for movement at the knees, elbows,waist, shoulders, neck etc.....


I then cut all the tubing to scale


I filed all the tubing edges so they could slot together easily where needed and to blunt them slightly so as the would not scratch or cut the wire which would weaken it for animating 


This picture shows the tubing cut and placed on top of the plans to make sure they are the right size


I used two sizes of K&S tubing which could then be slotted into each other. I done this so that every limb was replaceable incase they broke or were damaged during animation. If that happened I could then replace the limb rather then having to build a whole new armature.


Aluminum wire was used to allow the armature the ability to move


Strands of wire were twisted together to allow movement while also giving it strength for animating. I done this by holding wire in a vice and twisting it using a drill to get clean smooth twist.


I measured the wire as I did with my tubing and cut it to size


I covered the wire in a shrink wrap tubing to give extra strength and help prevent wire getting scratched and worn


I used a two part epoxy resin to glue my armature together


Here is my was joints and rigging points glued together


A finished arm replacement


Here is the finished main body of my armature

C.V


Here is my finished C.V for my business module