Ok Guys so here it is, the link to my Film Off The Rails all finished! I am quite happy with the result and have learned a lot while making it. Hope you enjoy!
Saturday
Off The Rails Final Film!
Ok Guys so here it is, the link to my Film Off The Rails all finished! I am quite happy with the result and have learned a lot while making it. Hope you enjoy!
Monday
Rig Removal
I had to use some rigs while filming for scenes where Ted was running and jumping and falling over at points where he was not making contact with the floor or where he needed extra support. The rigs were made easily using twisted wire attached to a block of wood with some K&S at the end so as it could attach to the rig points I made in Ted during the build.
In the shots where I knew I would be using rigs I began by taking a picture of the set without the puppet or rig in shot.
I then filmed the scene as I would normally using the rig when needed
After the whole scene was finished I took the shots with the rig into photoshop. I then placed the picture of the rig scenes over the initail empty picture of the set. Using a mixture of the eraser, clone stamp and paint tool I was able to get rid of the rig leaving the background scene and making it look like there was nothing there at all as seen below.
You can also do the same effect by masking the rig out in after effects but as I only required it for a few scenes and have a better understanding of photoshop i used it instead
Here is the frame with the rig removed
I also decided to make the sets look nicer by adding light to the train and tunnel which makes it look a lot better and stand out more as you can see in the shot below.
Here is the same process used for a different scene
One problem I did encounter was when the set changed from the initial shot which I forgot to think about at the start. For example in the scene above the gates open as Ted jumps over them so removing the rig became more difficult because I could not just use eraser tool and rig was gone as but using the tools in photoshop and a little time it was removed successfully. Im sure there are much easier ways to do this but it was my first time removing rigs so I was just using what I felt would work and was quite happy with the results
Another thing I forgot to do first time around was to remove the shadow the rig left as well as the rig itself. It was done using the same process as the rig but made me more aware to look out for these things in future
Filming
Here are a few of the behind the scenes shots of the filming process
This is a shot which I have now cut from the film but it was of Ted running to catch his tube
As you can see I didnt have a hugh space to work in but it was fine for what I had to do and for all that needed to be seen on screen.
I had to use rigs for a few shots at the start of the film where Ted is running, jumping and falling over. I will talk about how I removed the rigs in one of my next posts
I used the program stop motion pro 7 and a canon 450D camera to make my film
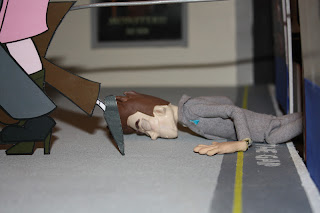
This is a shot involving both Ted and also the 2D characters where Ted gets trampled. I am very happy with how this look turned out in the end and with the other shots involving the 2D characters
As you can see I used a lot of flat set pieces to save on space and build time which dont look like much in photos like this but do look a lot better on camera when framed and lit right.
Here is the Final look of this shot
Final Ted
Here are some pictures of the final look of my main character Ted. Picture quality isnt great but you can get the idea
Just some poses for fun for my contact link!
Thursday
Time for 2D
So I wanted to try something a little different for my film by adding 2d characters into a 3d world. I decided to do this for many reasons such as to give my film a stylistic look, to make my main character stand out to keep down build and cost and to do something new and fun and interesting for myself.
My plan was to animated the characters in 2d, print the frames out and then re-animated them in the stop motion set.
I initially began this project with the intent to animate all the 2d characters myself..........Initially ha ha ha
As part of our course we have a section of marking for collaborations. I decided to ask my friend and classmate Jason Petherick to help with the 2d side as I like his cartoony style and felt it would fit my film well, also it gave us both the opportunity to collaborate and have something different for our showreels.
I designed the characters and put an animatic together to show Jason what I needed animated and he done a great job of it all so big thanks to him.
Once everything was animated in 2d I printed all the frames out on paper
I then glued all the paper to card to make it stronger so it was easier to re animate on my set
Then came the cutting....................
....................Lots of cutting!!!!!!!!
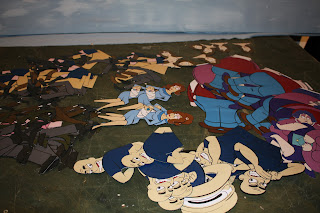
What I was left with were sections like this which were numbered and laid out for animating
Here is the punch sequence including some nice smear drawings
Lots and Lots and Lots of characters and Frames!!!!!
Here are some of the frames being used in a shot
Here is a link to Jasons Blog for those of you who wish to check out his work
http://jethckanimation.blogspot.co.uk/
Ready,SET,Go!!!!!!!!!
For my film I had to make quite a few sets including a tube train and tube stations. Between time constraints, facilites, equipment and ....MONEY I had to figure out the best way to achieve nice working sets that were easy and quick to make but also suited the style of the film also.
For the tube train itself I decided to make and exterior and interior seperatley so it would be easier to film.
I made the exterior out of foam board cutting out windows and doors with a scalpel.
I painted the doors and bottom of tube
I made the doors so that they could open and close using a sliding system so as they were animatable
To finish I added details like the tube logos and other signs
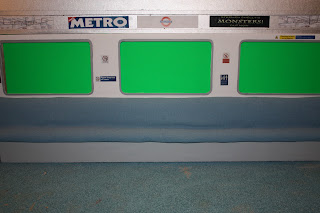
The interior was made simply also using foam board
The seat was made from wood covered in thin foam and then material
Final details were added using posters and signs and also I green screened the windows in order to add moving background in after effects
I needed a front view of tube for one shot it was made with foam board also
I added details such as bars and lights
To make it seem like the tube had interior I added a curved back to give dimension where I stuck an interior picture
The final look
For the tube stations I made tiled walls. To do this I masking taped some foam board added some filler I bought from a DIY store on top
Once dry I sanded it down to get it flat and smooth and then drew on the tiles as I wanted them to look
I then sanded the lines to give it the look of real tiles
Once sanded I painted the tiles to the right colour
Final set
Other props for the set were the ticket machines
I cut basic shape from hard foam
I marked out the machines and sanded out the detail
I added a space to allow the gates to open
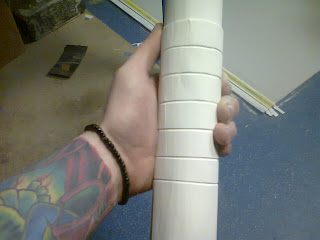
Also needed were pillars which I made to look like the walls I made using same method
Here Is the final set they were used in
Subscribe to:
Posts (Atom)


_00001.tif)